


Coastal Kitchen Makeover - The Plan
How to transform a dark and tired kitchen on a budget

New home, new kitchen. Well, almost. I have indeed moved into a new home, that’s right. But a totally new kitchen all together, that’s not on the cards. It would simply be a waste environmentally and budget-wise to throw perfectly good cabinets away. However, that does not mean that old cannot also become new. Having transformed an existing kitchen previously into a comfortable space that felt completely new, I am looking forward to doing it again and this is how I plan to realise it.

The before
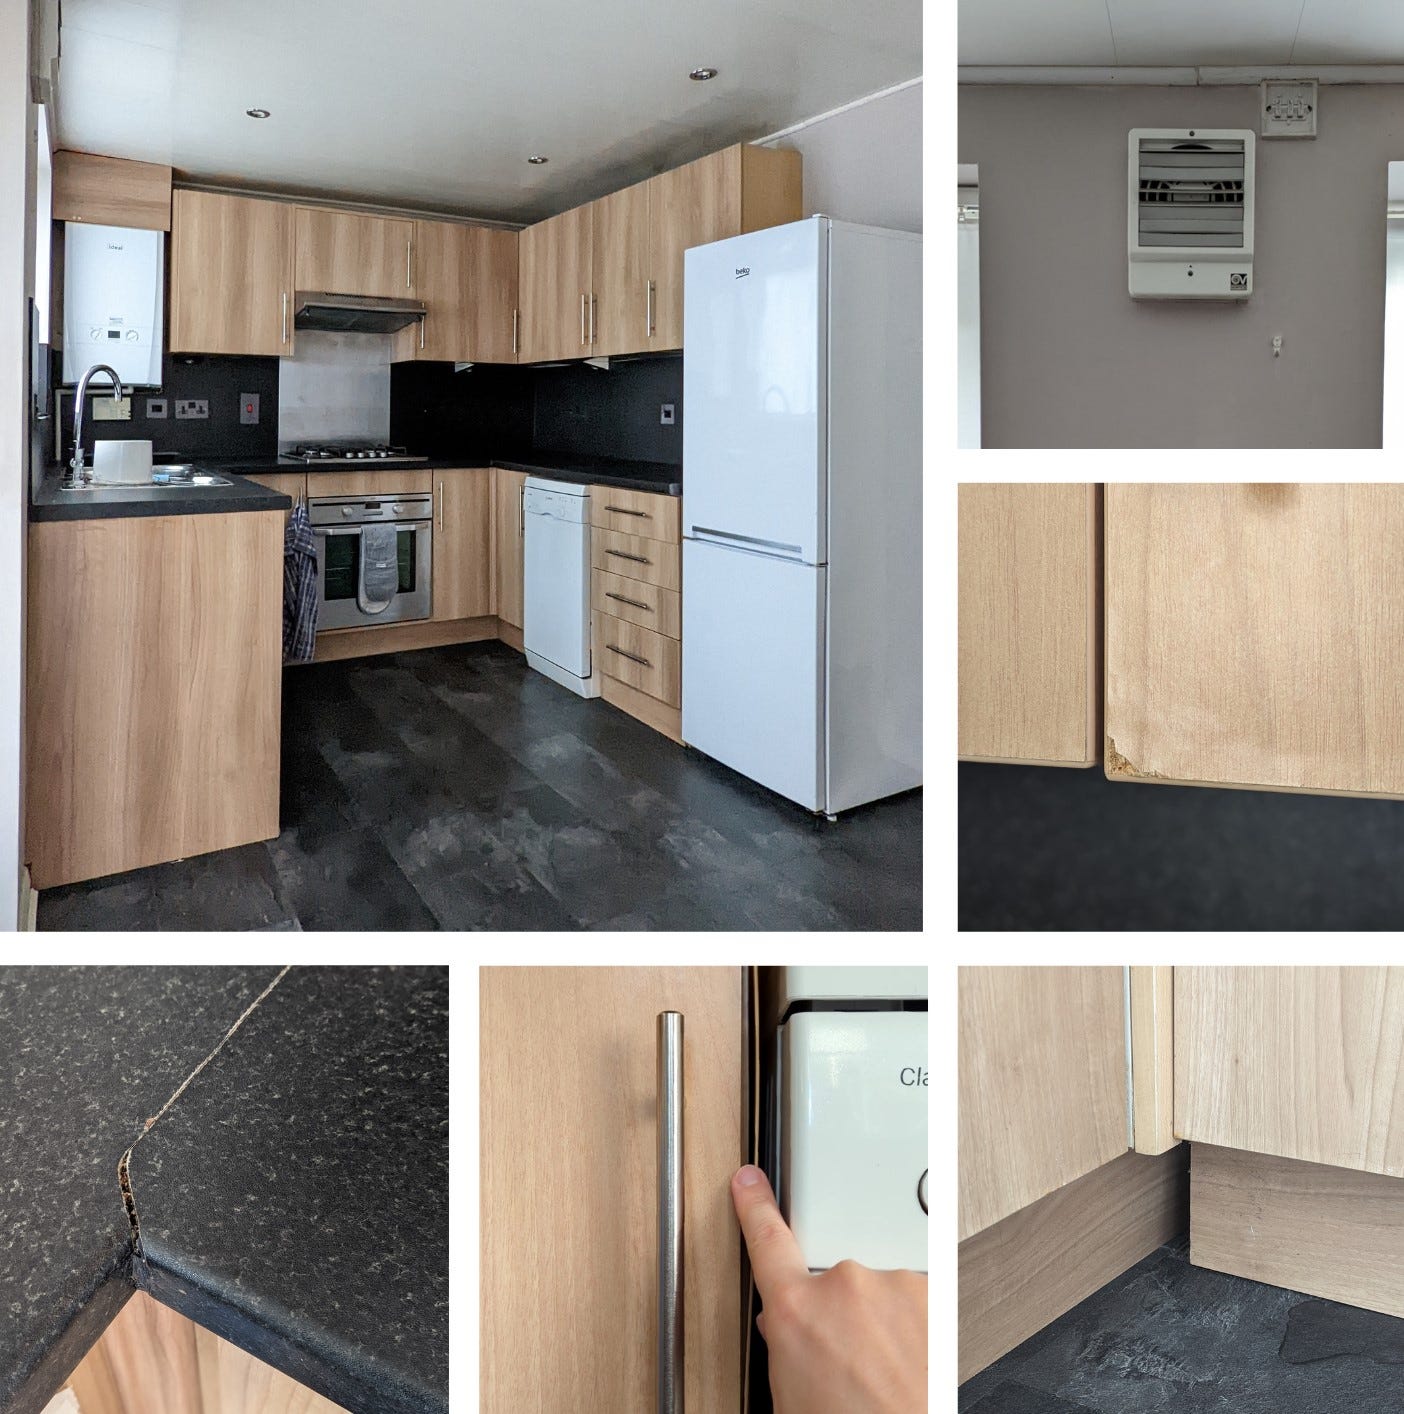
These pictures were taken the moment I got my keys and as you can see the kitchen from afar looks perfectly fine and that seemingly nothing needs doing to it. But the flaws are becoming quite obvious looking at the detail, as is very often the case. This is where it does become quite clear that an update, even if not a complete rip out, is unavoidable.
The concept
I always start any room update or renovation with a mood board. A simple tool to help me better structure my ideas, as there are many. But it is also helpful to tell the story of what I am about to create and hopefully helps you to imagine the final result too.

The colour scheme
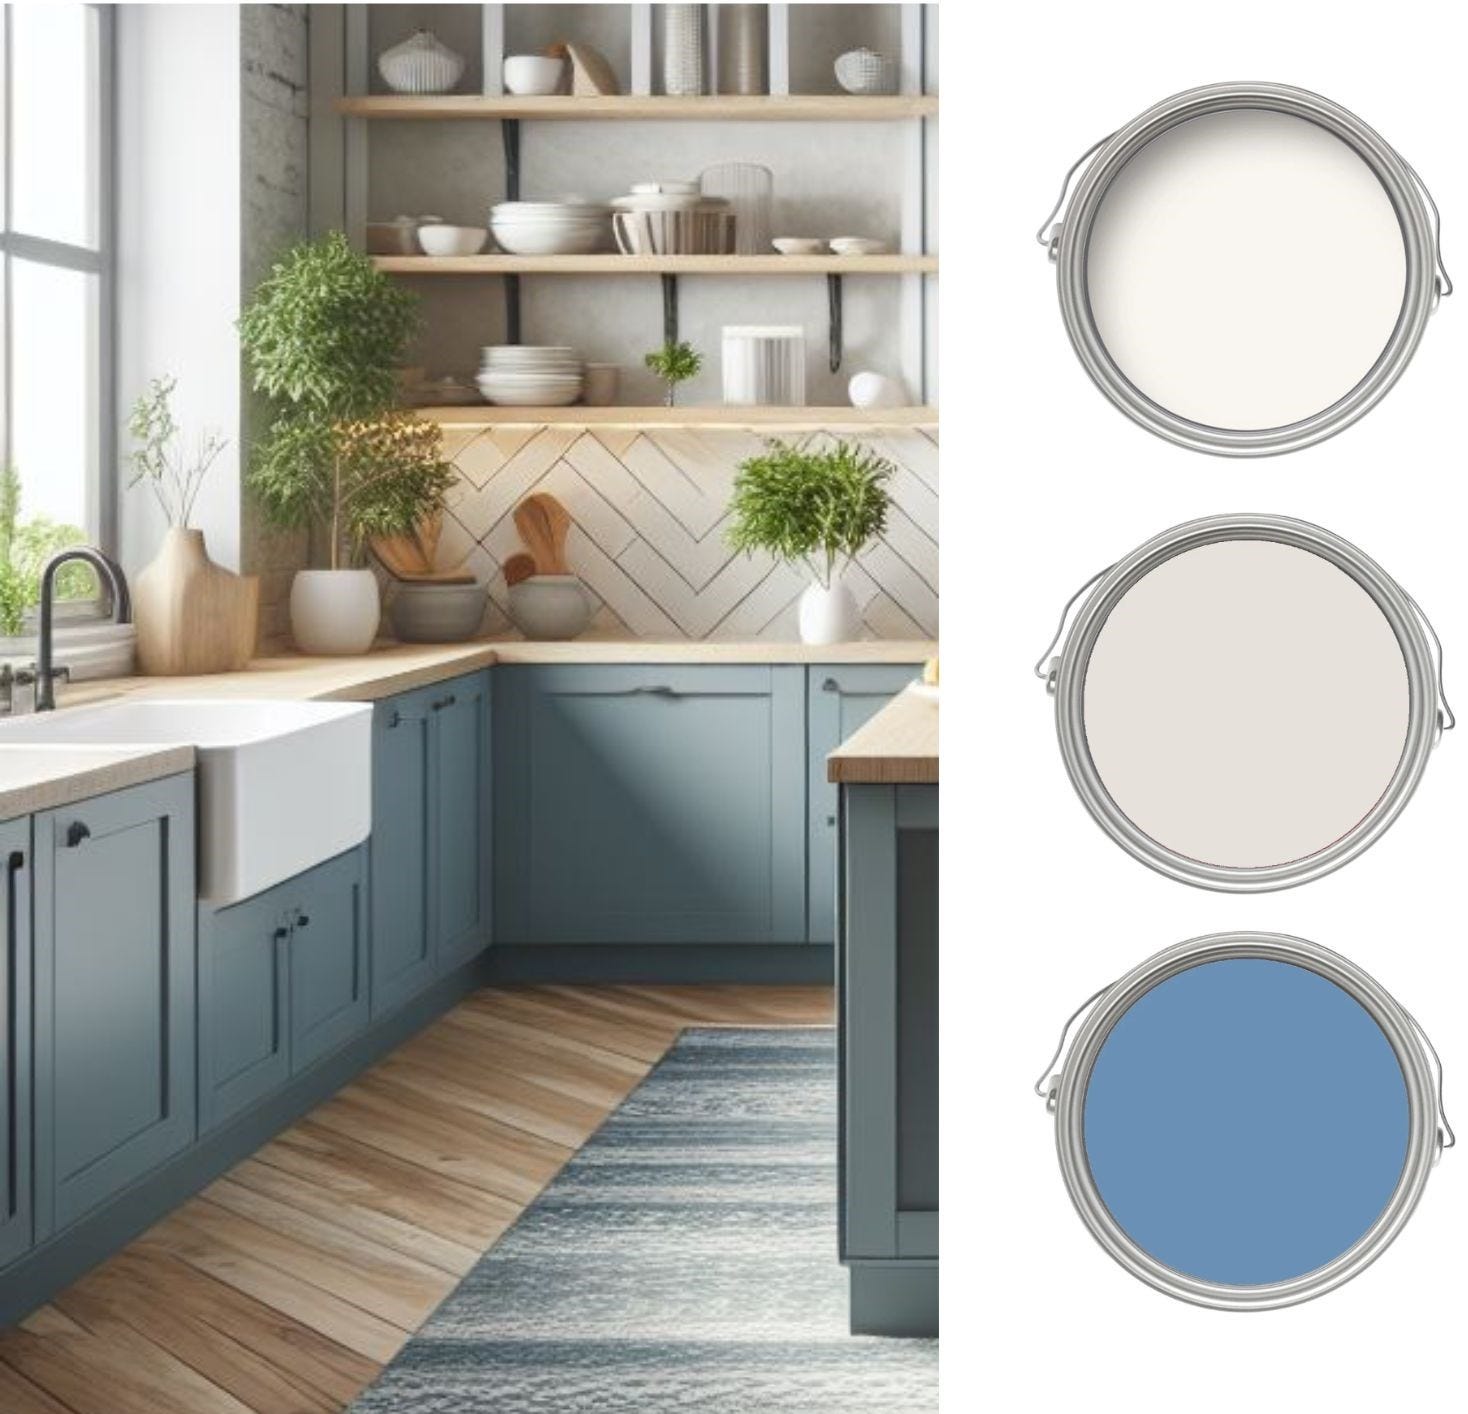
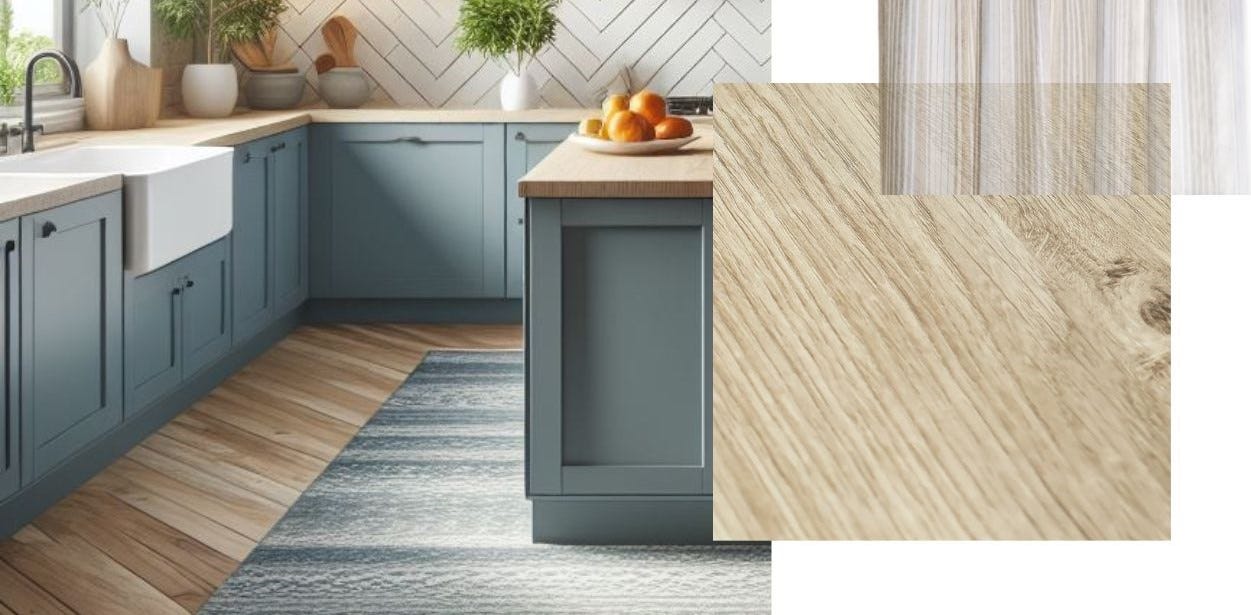
My surroundings always heavily influence my designs. In my last home, the lack of a garden evoked the need to add green to the kitchen, and this time, being by the coast, I am drawn to all the beautiful blues and sandy beige colours. In this particular space, considering the light in the room, I have settled on the lovely shade of Tivoli blue by little Little Greene for the bottom cabinets and their calming Portland Stone Pale for the top cupboards.
Using the blue for the entire kitchen, though I’d love it, would have simply felt too overwhelming in this space. So keeping the top cupboards bright and airy will balance the scheme. I will also keep the walls pared-back in this space, and throughout the whole of the house actually, and have settled on continuing to use my favourite Flint also by Little Greene. I have specifically chosen paint to transform the cabinets and walls as it is the most budget friendly and versatile way to update a space.
The cabinet fronts
To continue the concept of adding space, light and comfort, I committed to keeping this kitchen pared-back in its overall look and the simplicity of the existing cabinet doors suits this well. However, staying true to my design style, it would not be me creating a space if I would not add a little bit of interest.
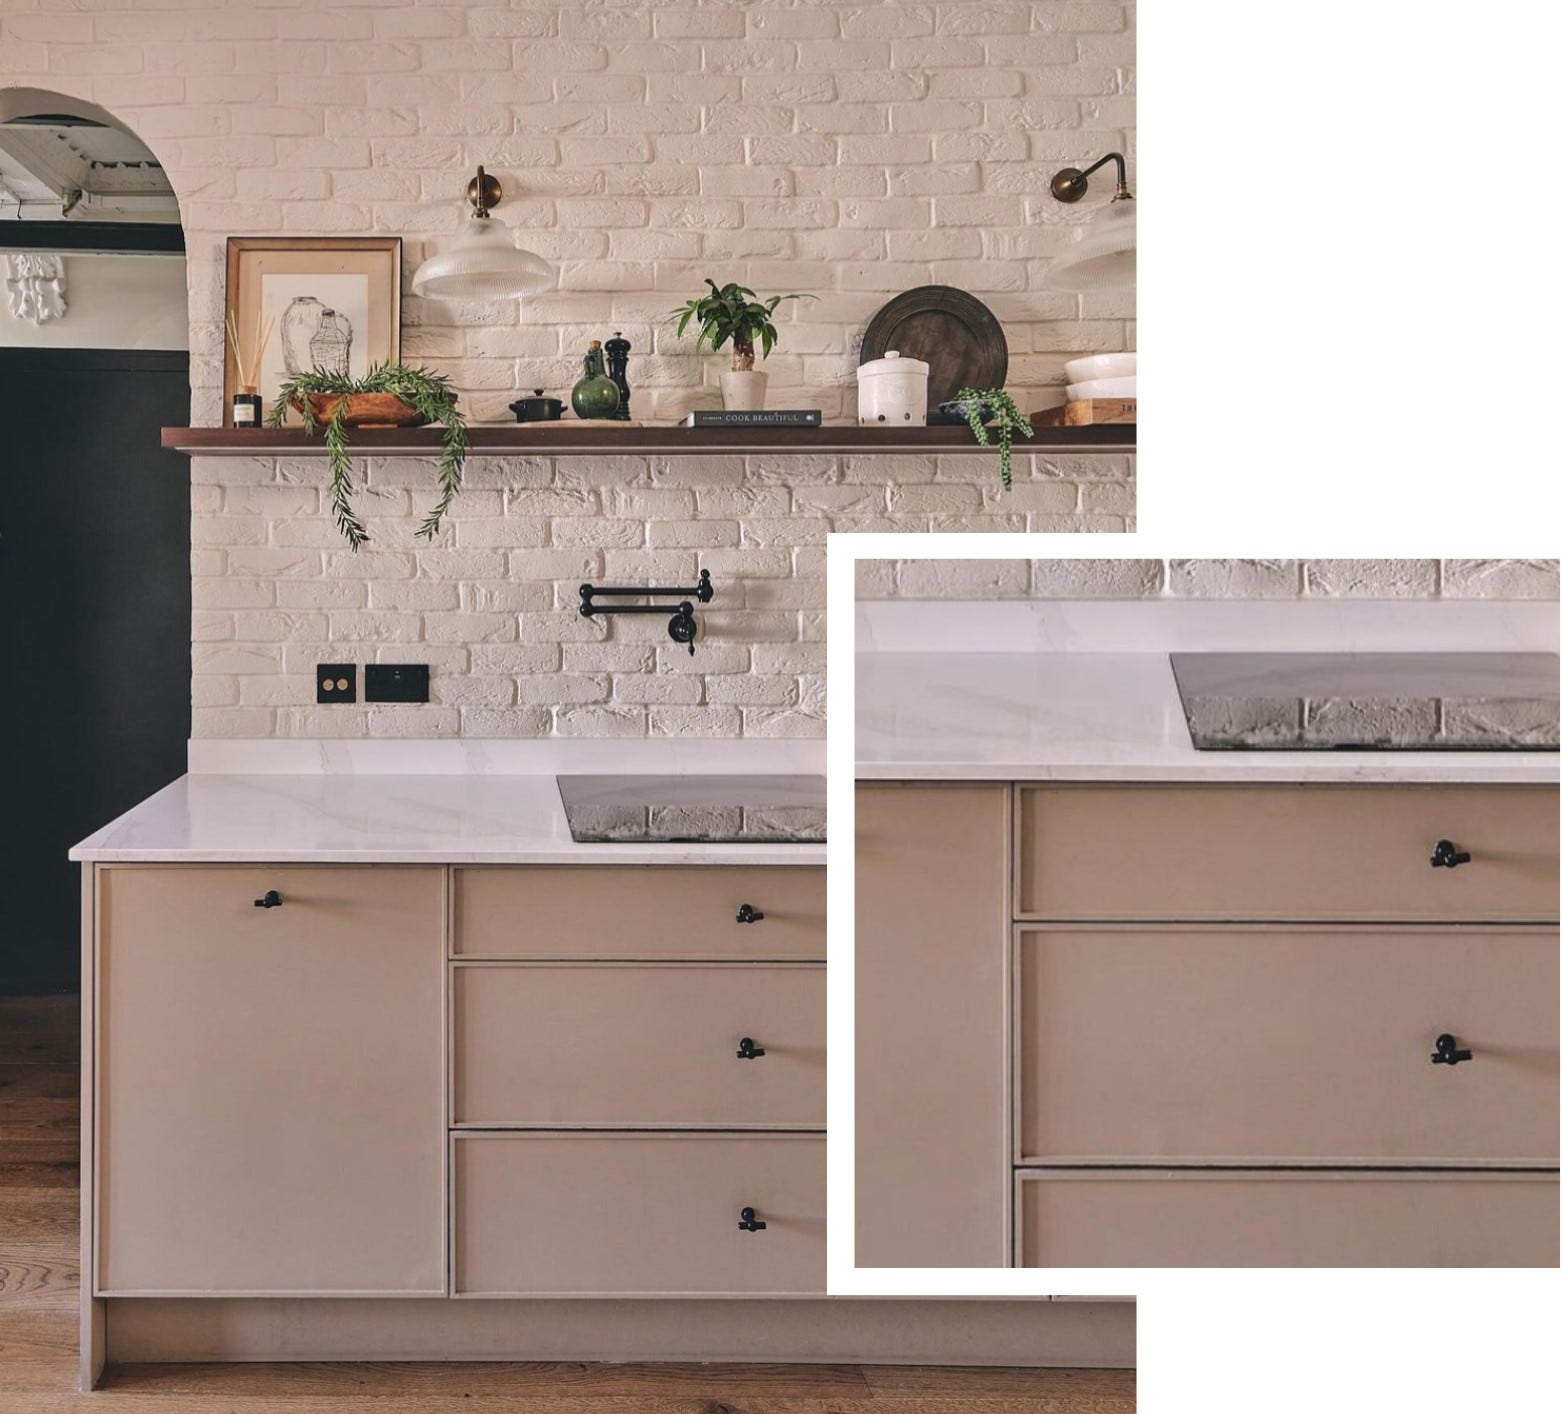
Constantly keeping an eye on developments in kitchen design, I saw a modern take on shaker style cupboard fronts popping up over the last months. Here the traditional thicker edge of the fronts is replaced by a much thinner and sleeker surround, as seen in projects by the likes of Sarah Sherman Samuel and her Quarterline line with Semihandmade, or closer to home by Athina from Topology in her kitchen. To achieve this look I will not replace the current cabinet fronts, but rather add the detail using moulding trim.
The splashback
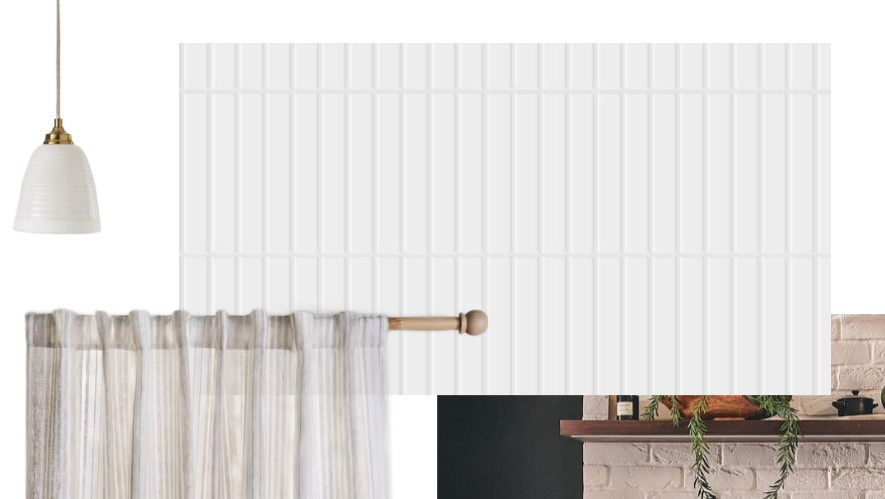
In my previous homes stencilling was my go-to when it came to splashbacks. But in the current kitchen I did not feel the splashback should draw any attention to itself, as other elements of the kitchen design will do that. So a pared-back but still budget friendly option was needed. After looking through endless inspirational images, I settled on a very simple tile effect where rectangle shaped white tiles would stack vertically on top of each other.

Though the kitchen is relatively small, the surface of the splashback is still not to be underestimated. This means using actual tiles would break the budget. Additionally, I did not like the idea of tiling over or replacing the already existing splashback board which is still in perfectly fine condition. The solution is using tile stickers instead, which I am told have come a long way in terms of quality. But, I do have to admit, this is the part of the makeover I am still quite unsure about. I will not know until I try, I guess, and will report back of course.
The worktop
Replacing the rather dark worktop is also unfortunately not in the budget. So if I am already trying self-adhesive tiles, why not extend this also to the worktop. Now, in this case I am no stranger to self-adhesive vinyl film, having used it successfully to upcycle my dining table, which after years of use is still holding up perfectly. To inject a bit of warmth into this design next to the mixture of blue and white, I decided to go with an oak style vinyl.
The detail
Updating the cupboard handles
A kitchen makeover in my eyes would not be complete without updating the cupboard handles. This is such a simple but important change to make, as more often than not this seemingly little detail sets the overall design apart.
For this project I have been very lucky to come across the perfect brass knobs in a charity shop. However, as there are not enough for all cupboard doors, I will be mixing these with handles that have moved with me since the London house. I knew holding on to them will be worthwhile and that they find their moment to shine.
Disguising the appliances
There’s a challenge, as all I can see in this kitchen is appliances, plus the boiler and its lovely copper piping. These all need disguising.
The solution for the boiler is simple as it can only be boxed in safely for security reasons. However, the dishwasher, washing machine and fridge require a more creative solution. There are many possibilities of course, like using contact paper or paint. But the idea of using either and covering up the important settings menus for instance is not appealing. So there’s really only the option of using curtains left, at least for the under counter appliances. Anita’s cabinet curtain is a great example and this would work really well with the budget and overall design of this kitchen, adding that little bit of further interest to the scheme.
Now I just need to bring this vision to life. I better get started…

That sounds REALLY exciting! And knowing you, I know it's going to be an amazing transformation. I can't wait to see the progress. Good luck! Let me know if I can help in any way xxx
You’ve laid the right foundations for your vision! Great post and really looking forward to seeing your progress. Colours picked are glorious and know your kitchen will have a beautiful finish with detail showing in every aspect. You’re great at creating the most impact but keeping it understated at same time. Can’t wait to see the finished result and joining you along the way Xx